⚠️ This Software Is a Test Version
StageMaster is currently a test version, still being verified for readiness for professional use. Specifications may change without notice, and bugs may remain.
Before any live stage or broadcast use, always run a thorough rehearsal. Please confirm operation under production conditions, using the actual equipment, audio/video sources, and cue data you plan to use.
The author provides no compensation whatsoever in the event of an accident. See "17. Disclaimer" for details.
If you notice anything during use, or encounter a bug, please contact shimada@jscf.pro.
StageMaster is an application for time-managing the progress of a stage show, presentation, or event.
Select a language: File > Preferences > Select Language (Japanese/English)
Select a theme: View > Style (Default/Light/Dark)
Configure the timeline: File > Preferences > Timeline Settings
Create new:   File > New   or   Cmd/Ctrl+N
Load existing file: File > Load   or   Cmd/Ctrl+O
Click the Append button → a dialog appears
Configure the following:
Click Save → the page is added
Repeat the above (Append → fill in → Save)
The "Insert Icon" button below each of the Stage notes and Lighting notes fields lets you embed an image icon in the text.
StageMasterIcons folder, which is
created automatically in the same location as the application itself(~/StageMasterIcons/icon0001.png))File > Save or Cmd/Ctrl+S
→ saved as a .stg file (ZIP file format)
File > Load → open the saved .stg file
Start button → the progress timer begins
Use: speech scripts, cue notes, slide narration
Fields:
Markdown support:
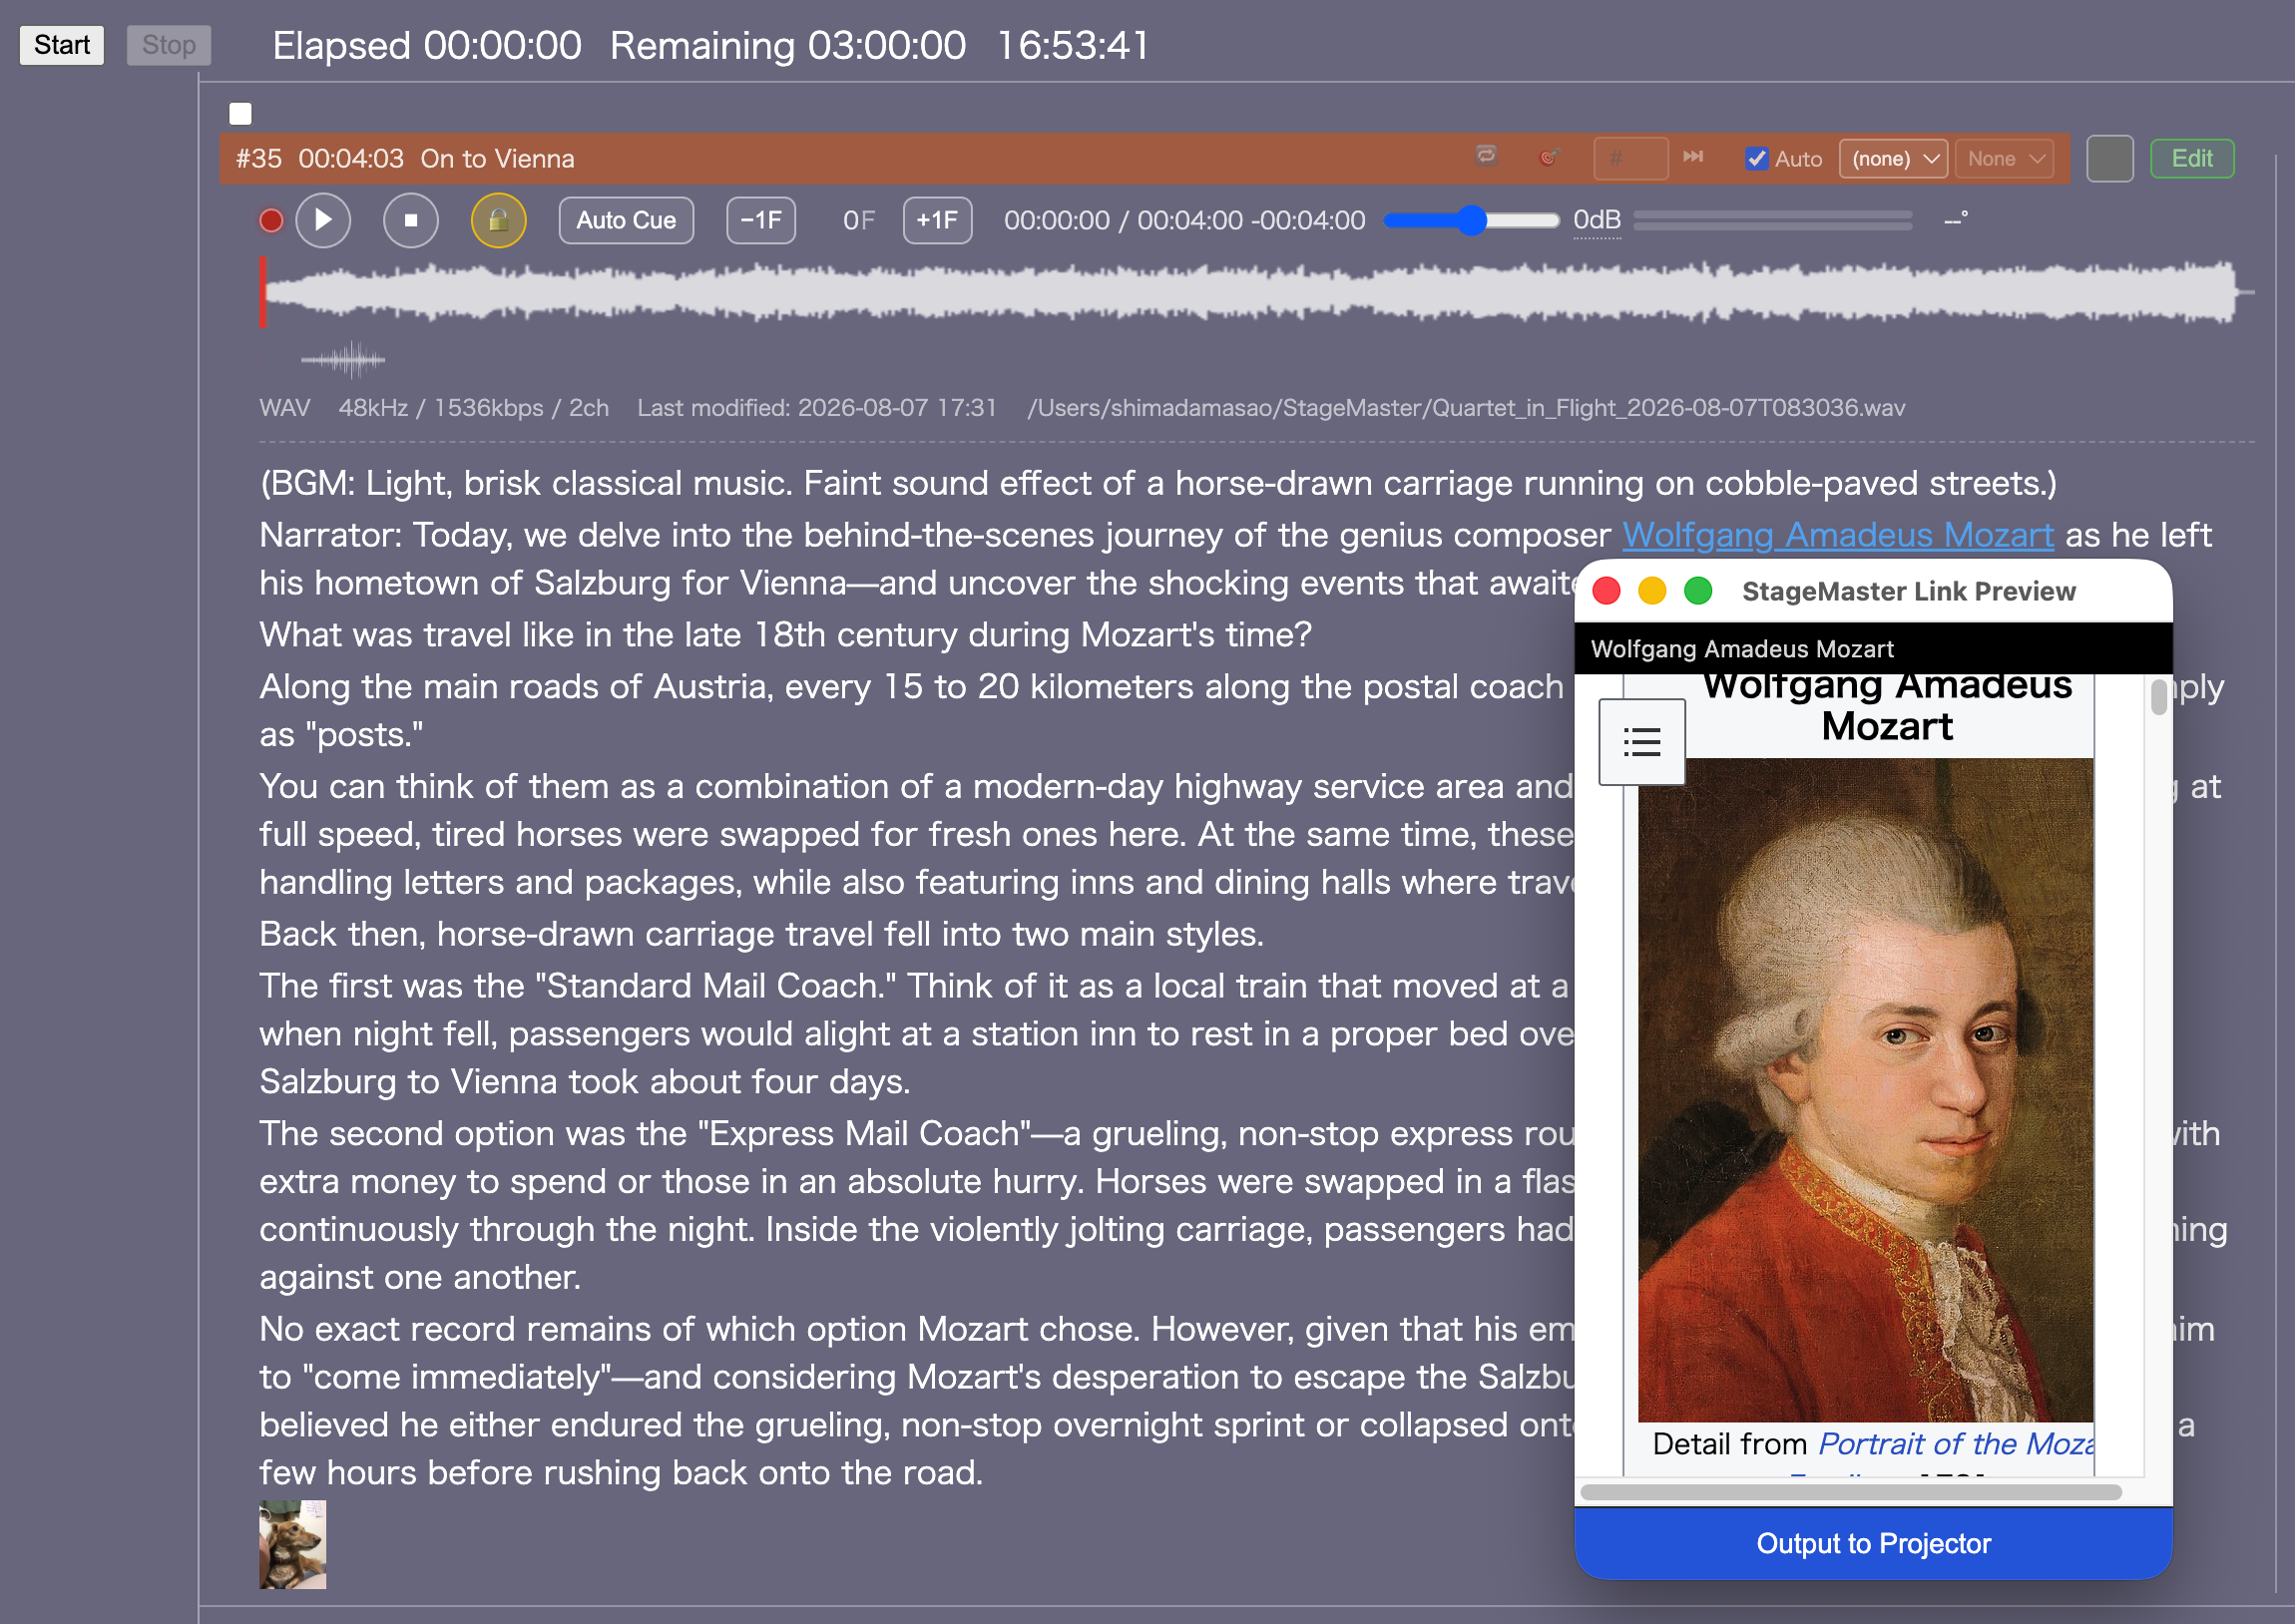
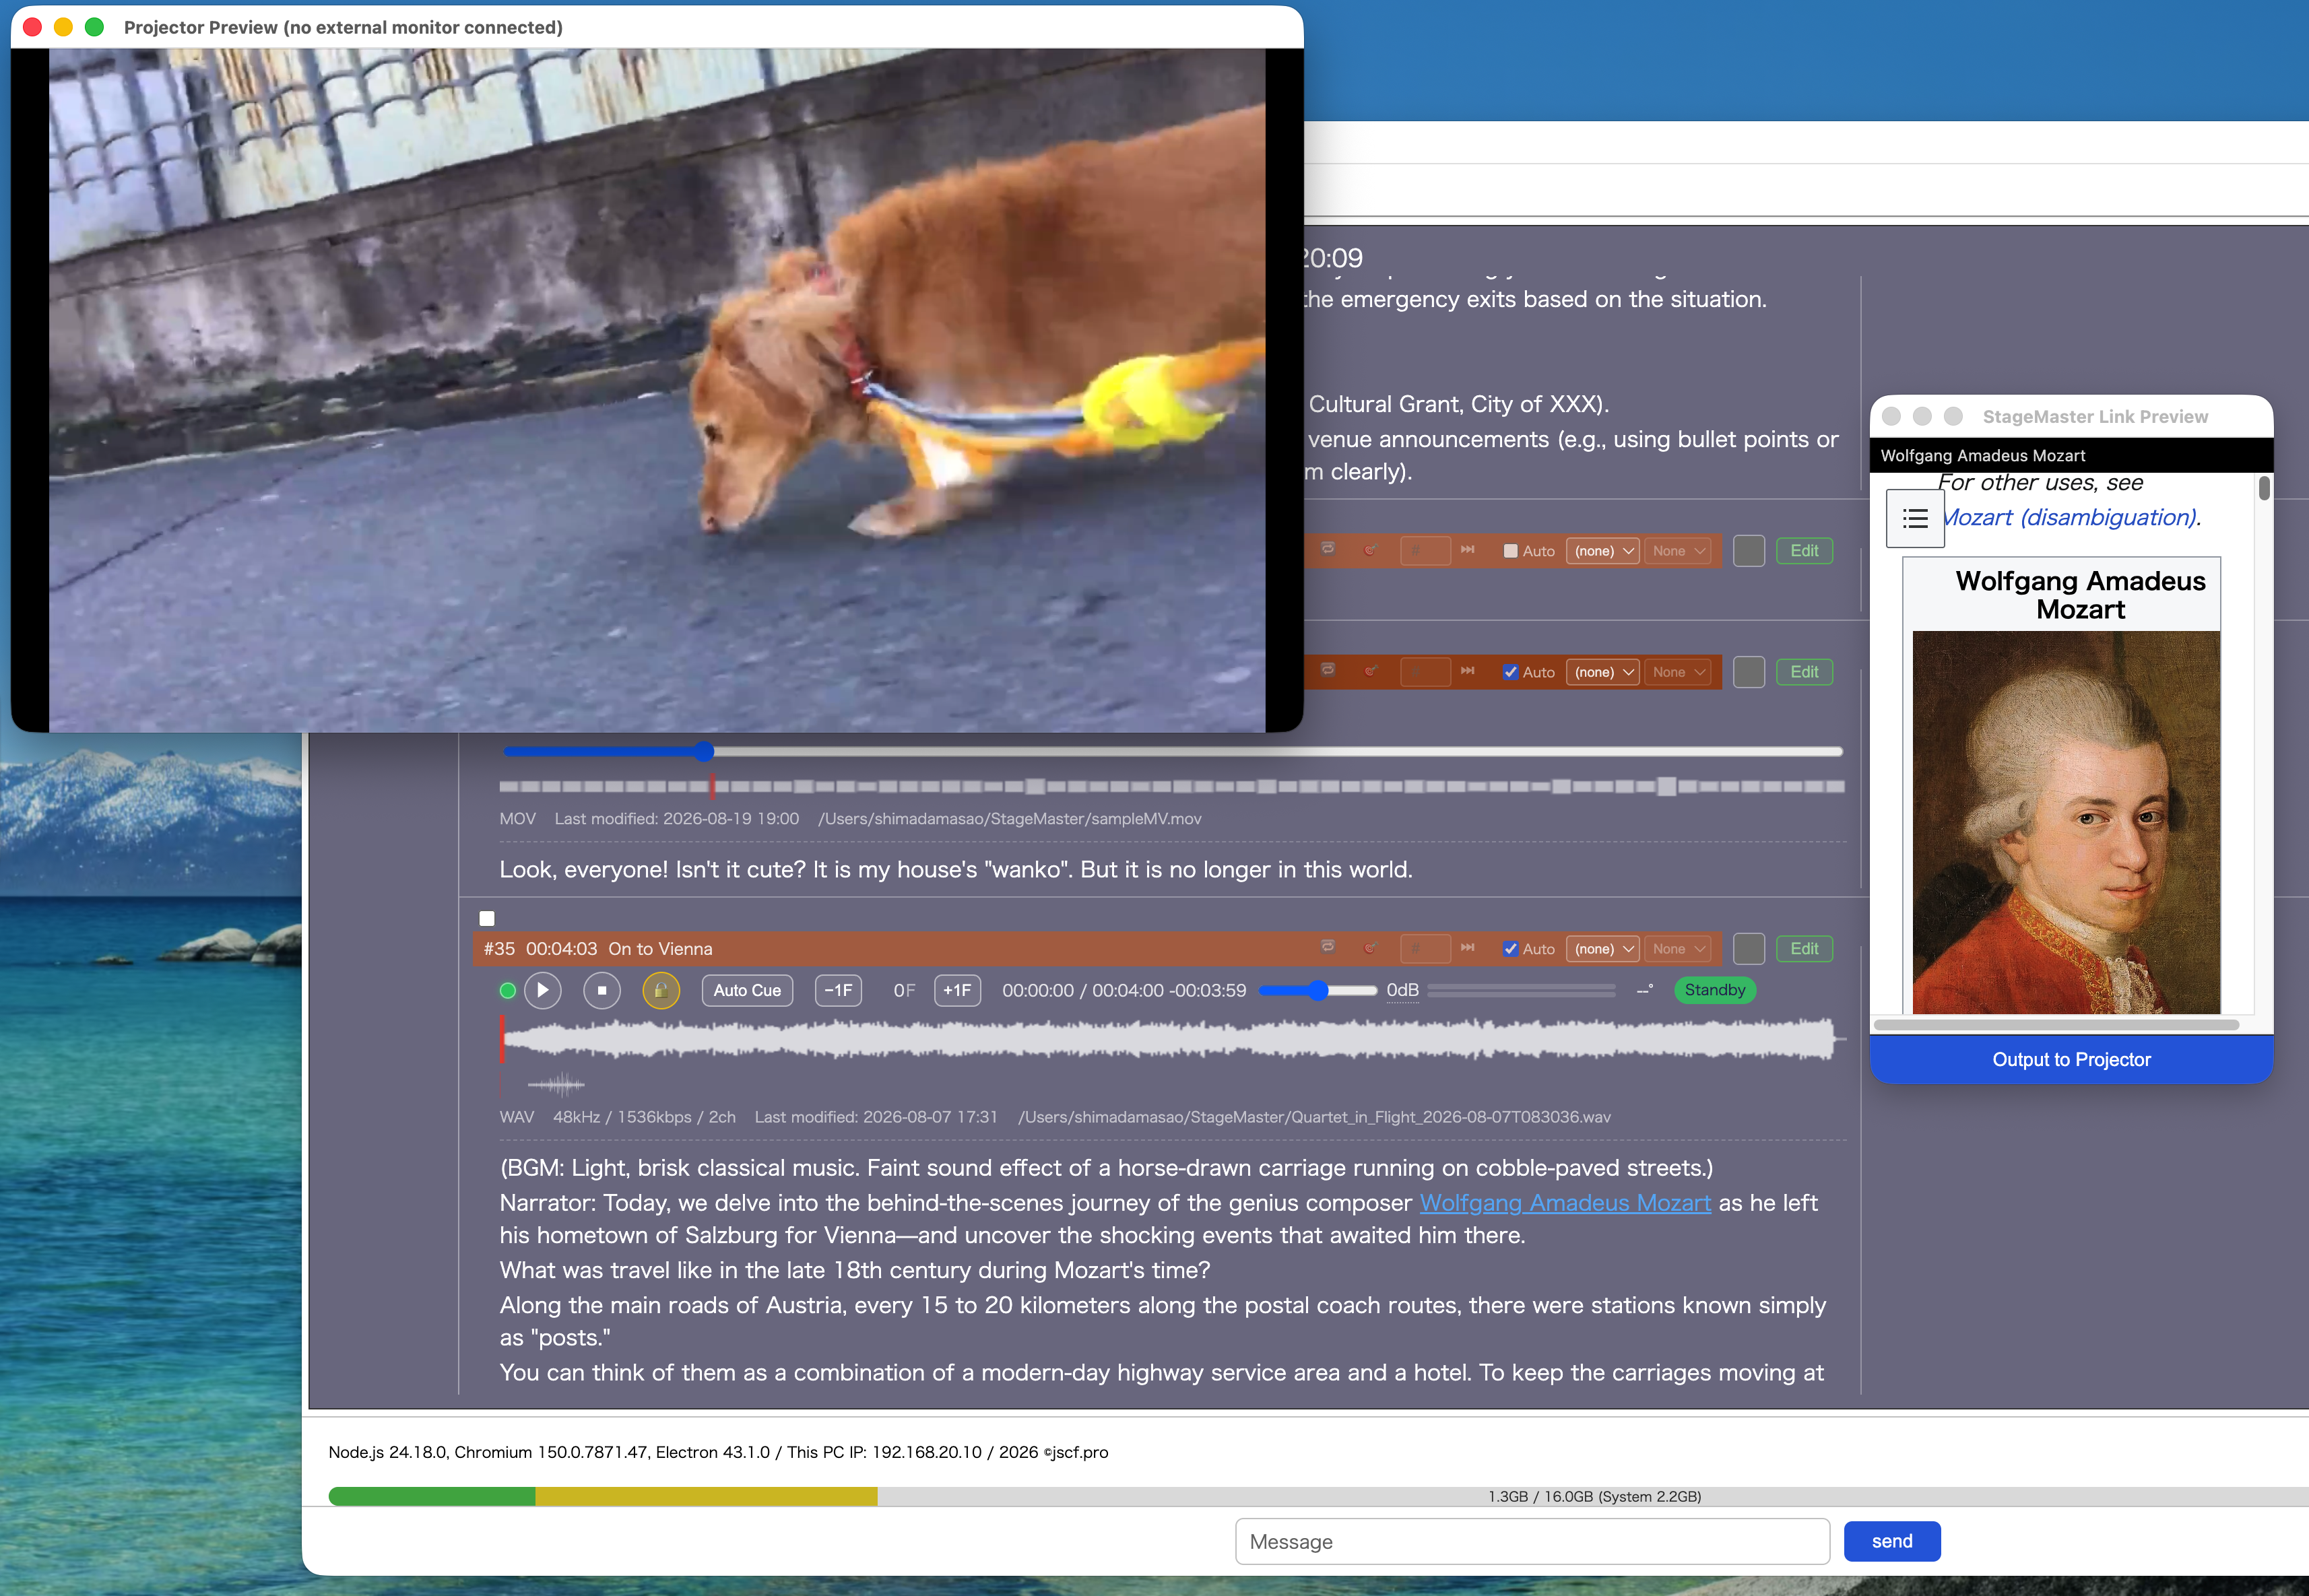
# Heading 1, ## Heading 2, ### Heading 3**bold**- bullet list[red]red text[/red] (color: red/blue/green/yellow/orange/purple)[text](https://...) (link)Link click behavior:
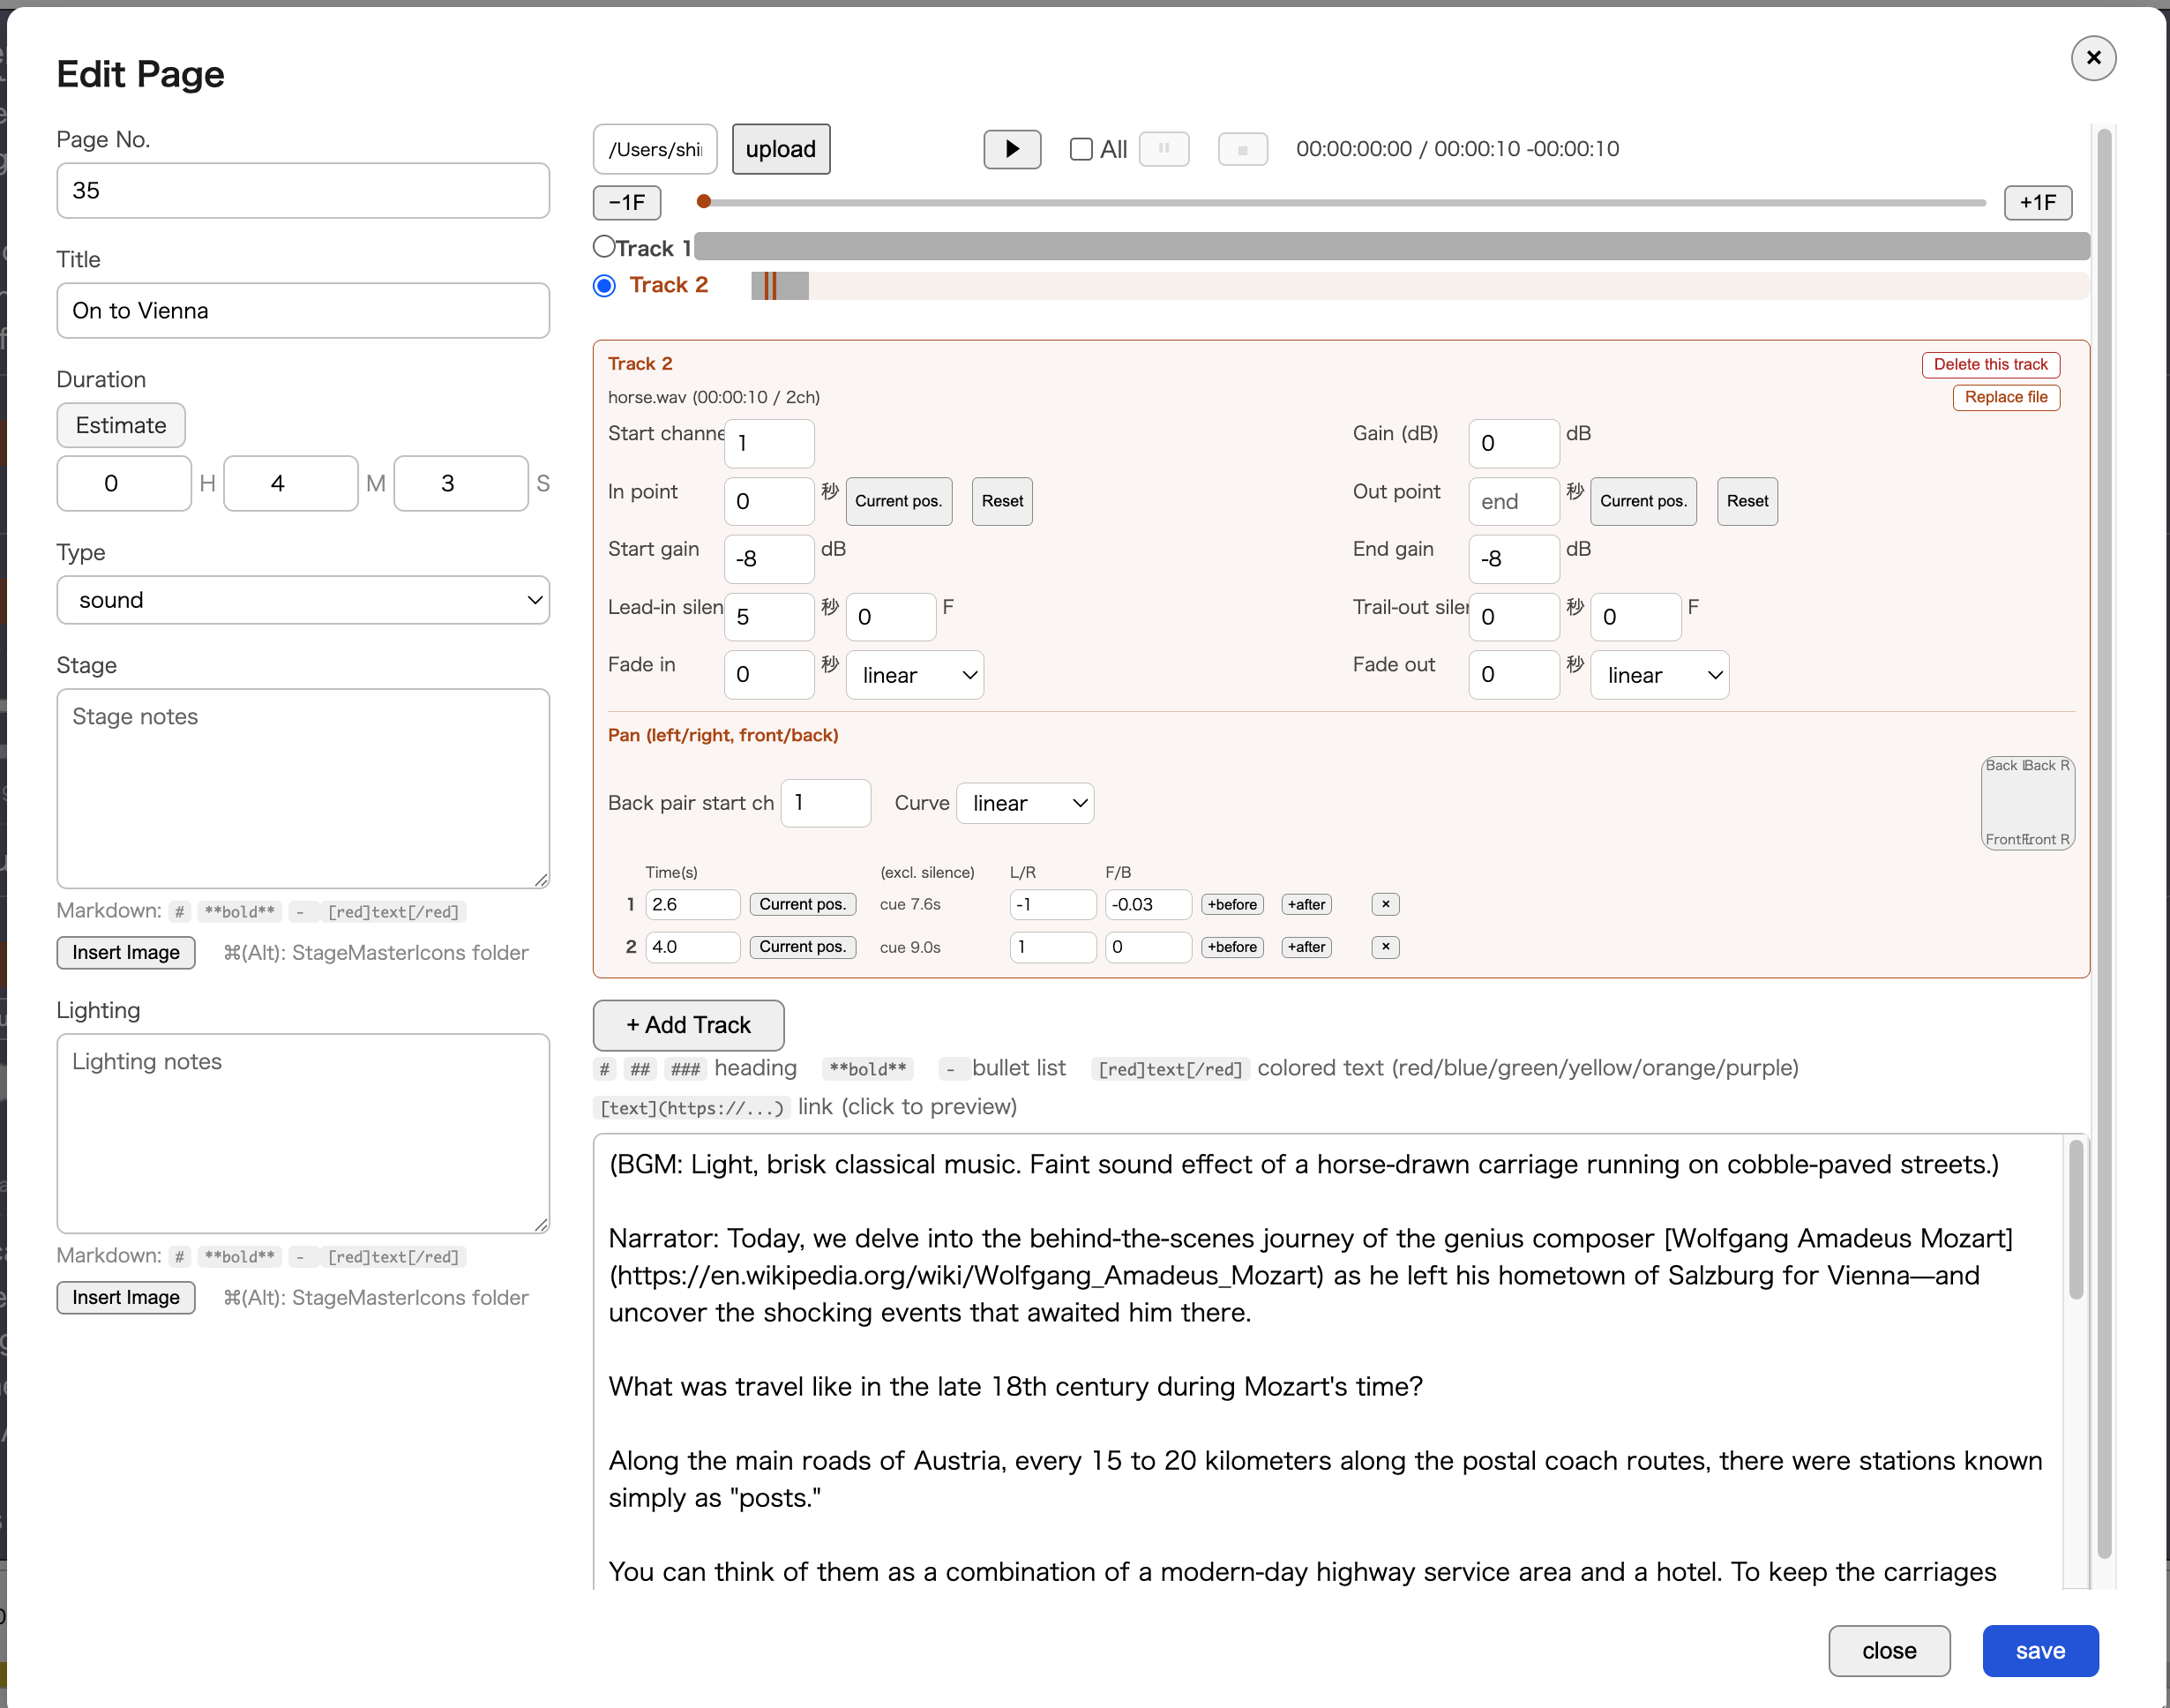
Playback:
Use: BGM, sound effects, narration
Required field:
Convenient features:
| Feature | Description |
|---|---|
| Cue-in | specify the start position (set by dragging on the waveform) |
| Lock | fix the cue-in position (playback resumes from the same position even after saving) |
| Auto Cue | automatically detect the end of a silent section |
| Gain | adjust output gain (in dB, per cue) |
| Standby | once locked, the play button becomes instant playback (shown as "Standby") |
Meter bar: displays the L/R channel levels
Multi-track editing: You can layer multiple audio tracks onto a single cue (additional tracks). In the per-track detail panel of the edit dialog, you can individually configure:
Pan (left/right, front/back positioning): You can move the sound's position over time.
Use: footage, YouTube streaming
File selection:
Use: send a MIDI command such as "start recording" to an external DAW (recording/audio software) in sync with a cue's playback start (can be configured on any page, regardless of type)
Fields (on each page row in the list, next to the auto-advance icons 🔁/🎯/⏭):
Behavior: When this cue's playback starts, a Mackie Control Universal (MCU) format MIDI command corresponding to the chosen action is sent to the single MIDI output port configured in Preferences. This is not a feature that switches the destination port per DAW.
Advance preparation required: The app itself does not create a virtual MIDI port. In advance, create a virtual MIDI port — the IAC Driver in "Audio MIDI Setup" on macOS, or loopMIDI etc. on Windows — and assign that port to the DAW's MCU control surface input. For selecting the port itself, see "14. Changing Settings."
First click: starts playback
Clicking during playback:
Stop button "⏹":
| Mode | Symbol | Behavior | Example use |
|---|---|---|---|
| Loop | 🔁 | replays the same page repeatedly | standby BGM, slideshow |
| Goto | 🎯 | jumps to a specified page number | conditional branching, returning to a specific scene |
| Next | ⏭ | auto-advances to the next page | proceeding in order |
Click a page's auto-advance button (🔁 / 🎯 / ⏭)
While the progress timer is running via the Start button, auto-advance (all three modes — Loop/Goto/Next) is disabled
Each page row has an "Auto-Execute" checkbox, separate from the auto-advance buttons (🔁/🎯/⏭). Both are "trigger the next action automatically" features, but they operate under opposite conditions.
| Auto-Advance (🔁/🎯/⏭) | Auto-Execute (checkbox) | |
|---|---|---|
| When it operates | Only while Start is OFF (during rehearsal) | Only while Start is ON (the show's progress timer is running) |
| What it does | Decides how to connect to the next page once this page's playback/timer ends (loop / move to a specified page / go to next) | The instant the elapsed time since Start (or the pre-show countdown) reaches this page's scheduled position on the timeline, it automatically presses the Play button |
| Where to configure it | The 🔁/🎯/⏭ buttons on each page row | The "Auto-Execute" checkbox on each page row |
| Key | Function | Note |
|---|---|---|
| ↑ Up arrow | move selection to the previous page | |
| ↓ Down arrow | move selection to the next page | |
| Spacebar | toggle play/stop for the selected page | Master role only |
| Cmd/Ctrl+N | new document | |
| Cmd/Ctrl+O | load file | |
| Cmd/Ctrl+S | save file |
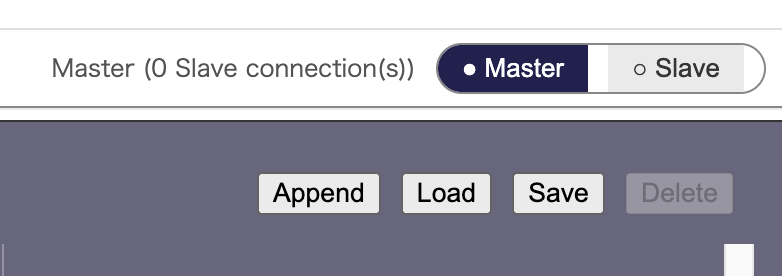
Master (in charge of running the show):
Slave (in charge of remote display):
192.168.0.10 → OKBy default, as described above, the Slave is "display only" and produces no audio or video of its own. Turning on "Slave performs sync playback" in File > Preferences switches to a mode where the Slave machine actually executes the Master's play/pause/stop/ stop-all actions itself, and actually plays the audio or video (e.g. simultaneous playback across multiple venues or multiple screens).
Prerequisites for using sync playback:

| File | Contents | Save location |
|---|---|---|
| data.json | the last cue sheet opened | user data folder |
| config.json | timeline settings | user data folder |
| settings.json | language/theme settings | user data folder |
Save locations:
~/Library/Application Support/StageMaster/%APPDATA%\StageMaster\~/.config/StageMaster/| Button | Function |
|---|---|
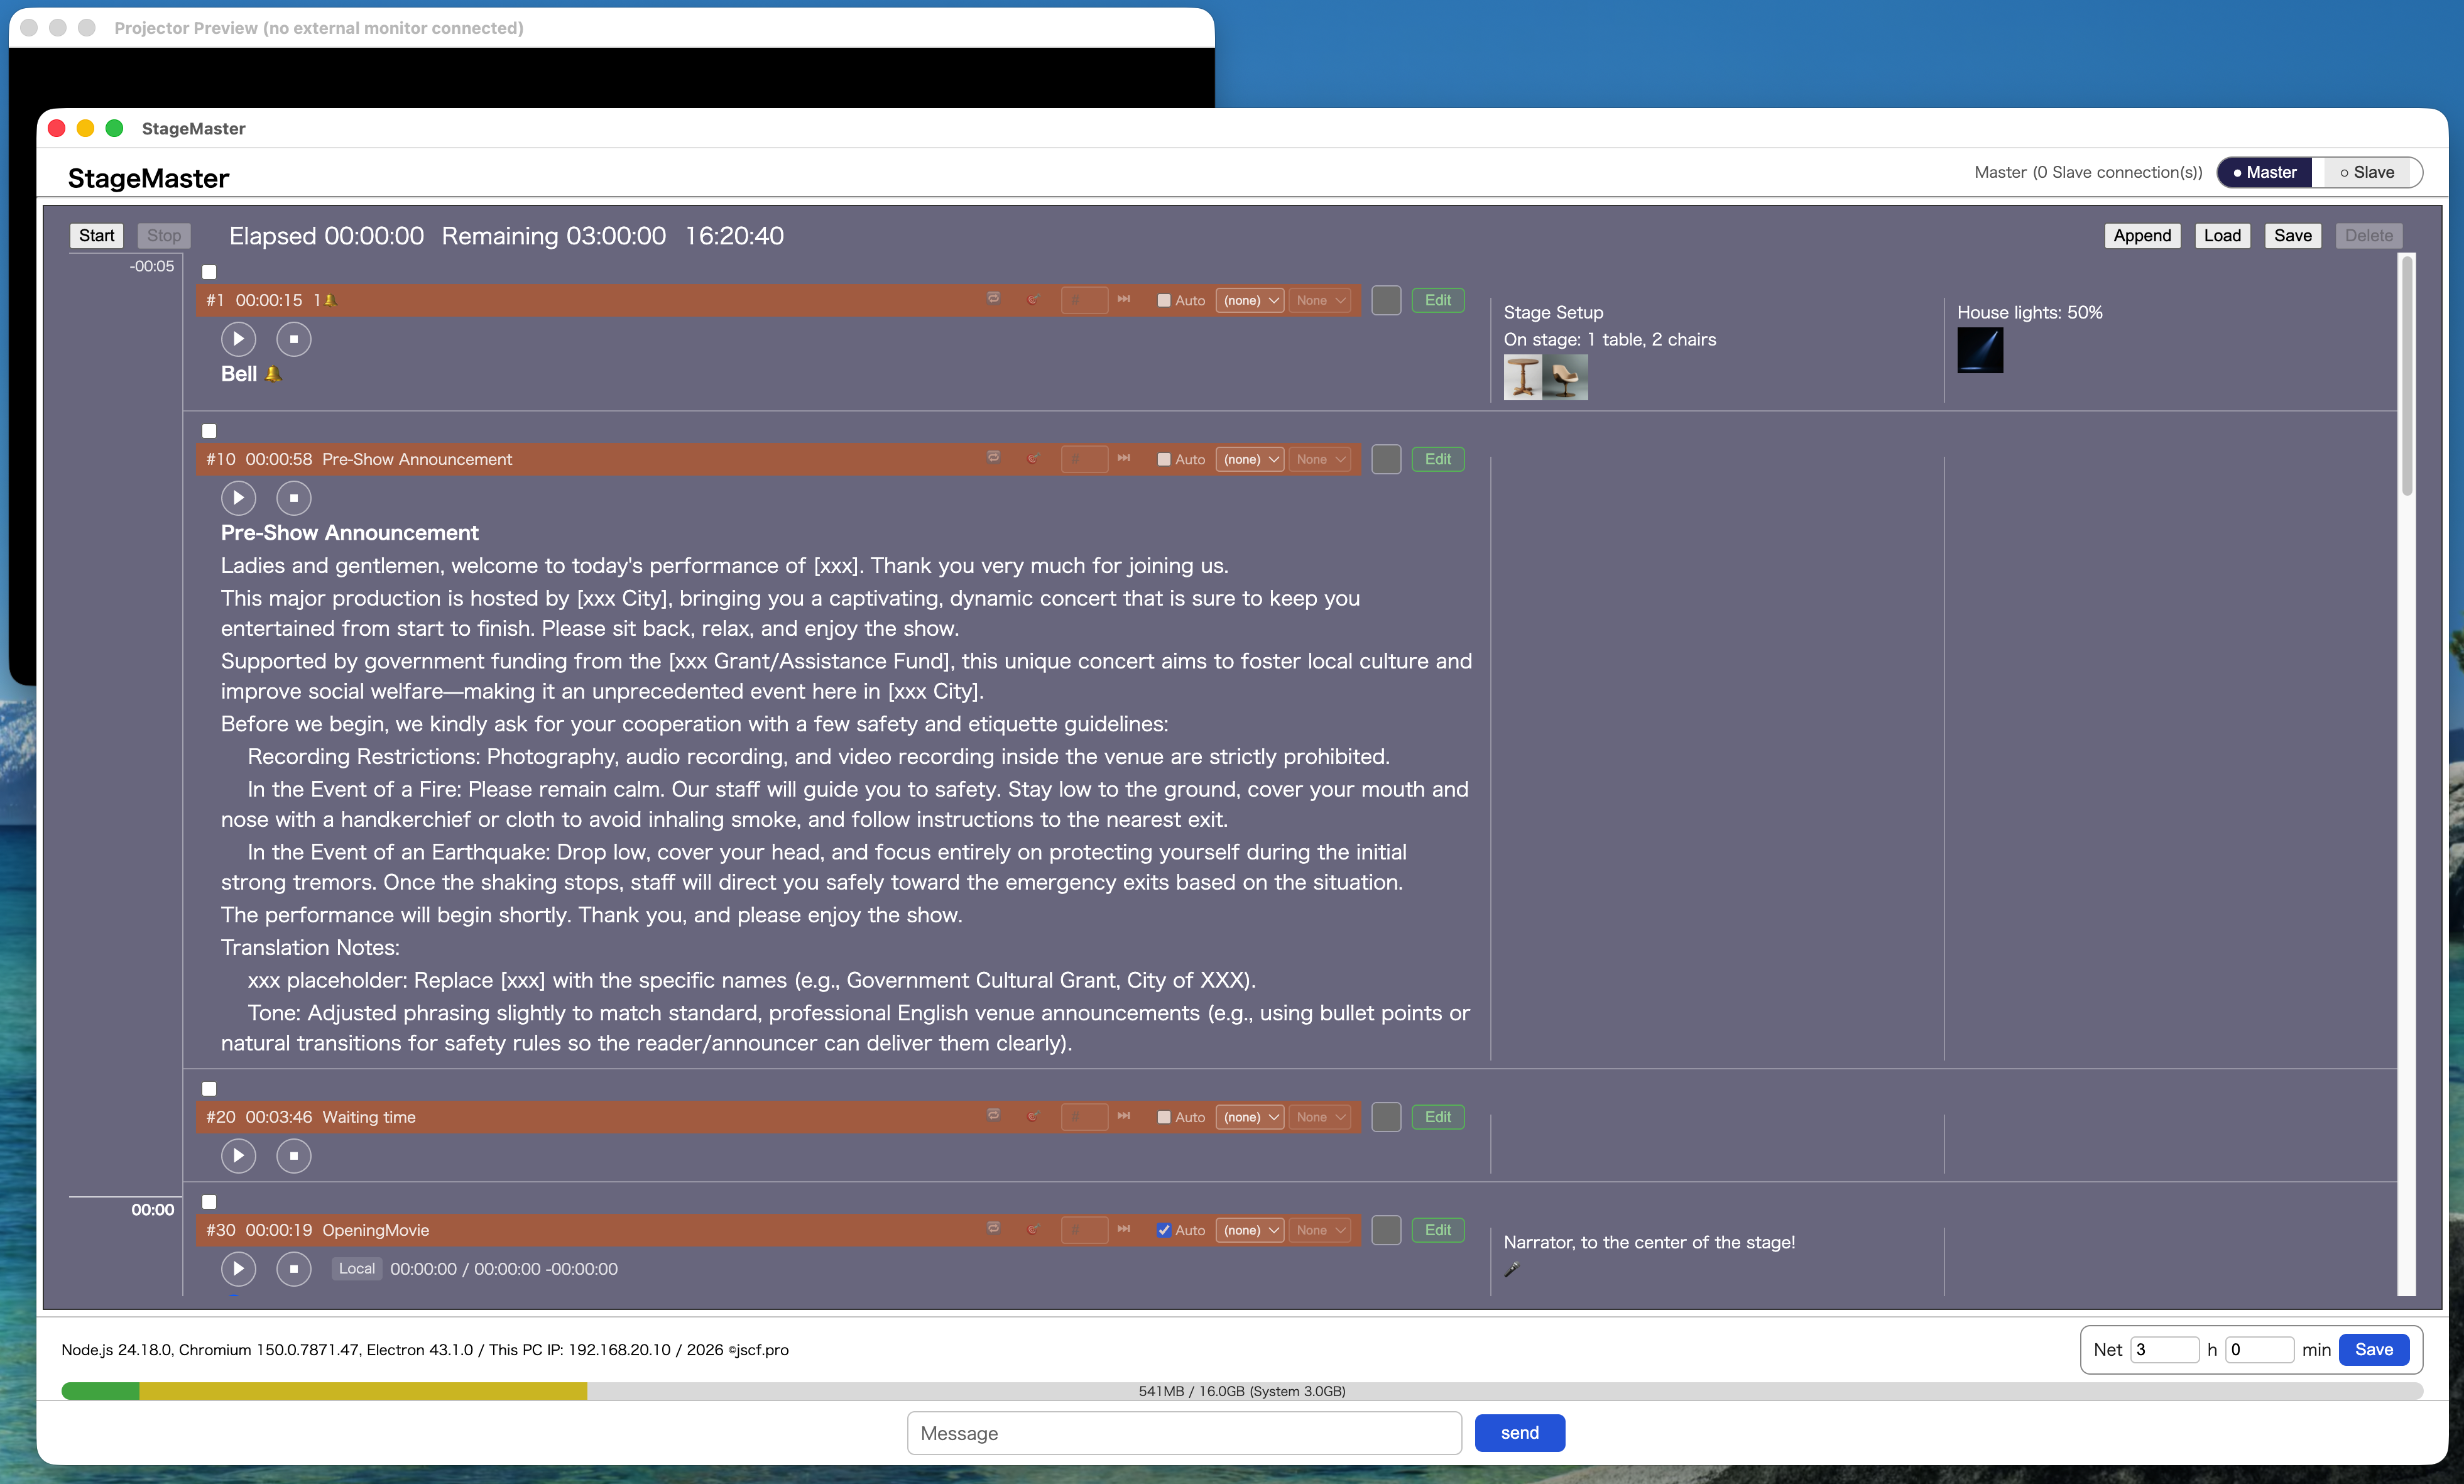
| Start | starts the progress timer |
| Stop | stops the progress timer (two-step confirmation) |
| Append | adds a new page |
| Load | loads a file |
| Save | saves the file |
| Delete | deletes a page (only active once a deletion target is selected) |
The header area of each page row in the list (next to the Edit button) has a color picker. Clicking it and choosing a color immediately reflects it as that page row's background color. The chosen color is saved (kept in the .stg file) and persists the next time the file is loaded. This is intended for color-coding individual pages — e.g. "this page is a blackout" or "needs attention" — so they're easier to spot in the list during the show.
Selecting View > Blackout External Monitor overlays the external monitor's display (the projection window) with black, instantly blacking it out. Selecting it again removes the overlay and restores the original display (video/YouTube/web link projection, etc.). Video and narration playback itself is not stopped — this only hides what's visible, so whatever was playing is still there when you turn the blackout off.
| Command | Function |
|---|---|
| Preferences | settings for the timeline, audio output, DAW integration (MIDI), Slave sync playback, and more |
| Channel Mixer | a tool that combines up to three stereo audio files per channel, burning in a test tone as well, to export a file for multi-channel verification (for creating a new file only — a separate feature from the 4ch/6ch routing settings used during live playback) |
| Master Meter | shows the master (final stage) level meter at all times in a separate window |
| Data Folder | opens the folder containing the saved data |
Elapsed 00:00:00              ← time elapsed since the timer started
Remaining --:--:--             ← time remaining until the configured end time
00:00:00                       ← the current wall clock time
Predicted end time: --:--      ← the predicted end time
Things to check
Things to check
ipconfig/ifconfig)Things to check
Things to check
Cause
Fix
Cmd/Ctrl+N     New document
Cmd/Ctrl+O     Load file
Cmd/Ctrl+S     Save file
↑              Select previous page
↓              Select next page
Space          Play/stop the selected page (Master only)
File > Preferences > Select Language
→ choose Japanese / English → reflected across the entire screen immediately
View > Style
→ choose Default / Light / Dark
File > Preferences > Timeline Settings
→ change the start time, end time, and interval
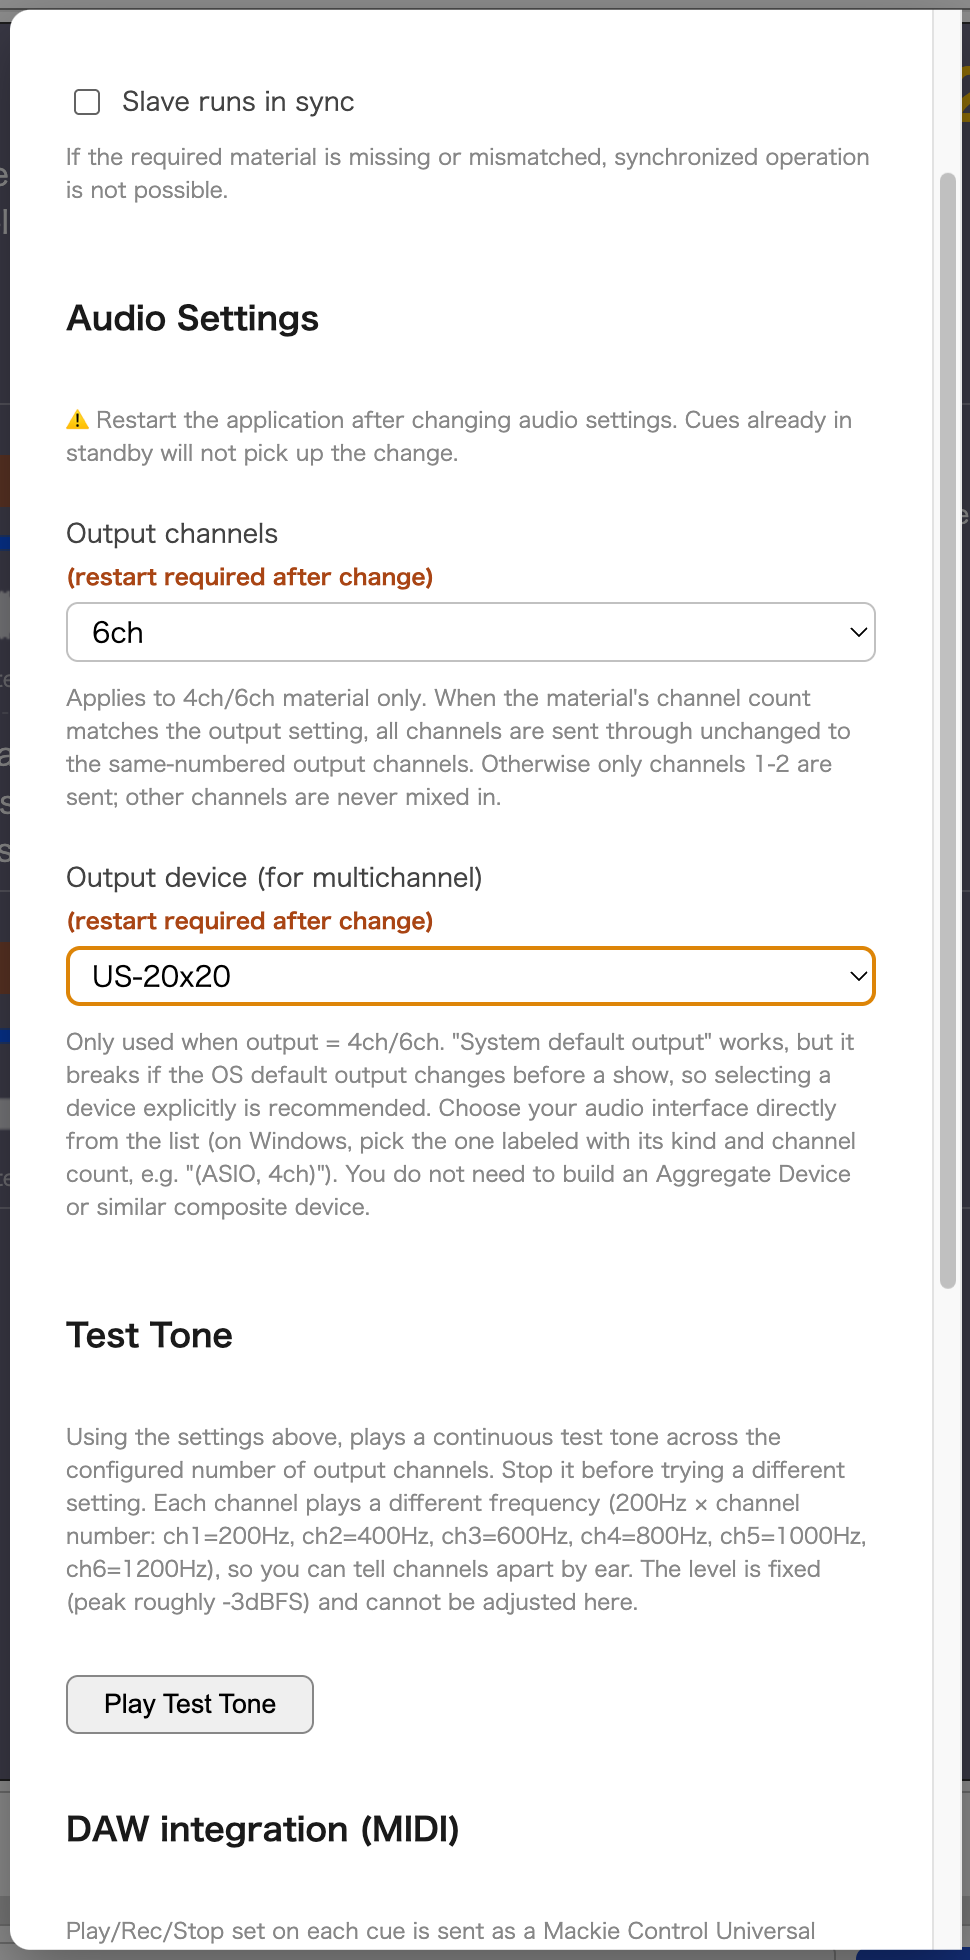
File > Preferences > Audio Settings
→ Number of output channels: 2ch / 4ch / 6ch
→ Output device (for multi-channel): choose from the list
This feature sends 4ch/6ch source material (channels 1-2-3-4, or 1-2-3-4-5-6) straight through to the corresponding channels on the output interface.
The material's channel count is auto-detected from the WAV/AIFF header (mp3 is always treated as 2ch, since it tops out at 2ch by spec). Ordinary 2ch material's behavior never changes regardless of this setting. Separated output up to 6 channels has been confirmed on real hardware even on a 20-channel-class interface (e.g. TASCAM US-20x20).
Always explicitly select the output device. It will still work if left on "the system's default output," but it will break if the OS's default output changes before the show.
⚠️ Restart the application after changing this setting. Changing "number of output channels" or "output device" does not take effect for a source that is already in a standby state (a locked cue). This is because standby begins waiting using the state that existed before the setting was changed. After changing an audio setting, always restart the application before checking it and going into the show.
The Windows build uses the native audio engine by default (ASIO preferred, WASAPI as a fallback). The VoiceMeeter-based setup required in earlier versions is now generally unnecessary.
(ASIO, 4ch))Windows has no concept of a "default ASIO," so if nothing is chosen, the default becomes a 2ch WASAPI endpoint. To use 4 or more channels, you must explicitly select the ASIO device in Preferences. The same hardware may appear in the list under both an ASIO name and a WASAPI name — for multi-channel use, choose the ASIO one.
Only when more advanced routing is needed — for example, verifying a configuration with more than 8 channels — can the traditional method of going through VoiceMeeter (Virtual ASIO) also be used.
Selecting the interface on its own directly can result in channels 3 and beyond not being output, and getting mixed into channels 1-2 instead.
If the above prerequisites are missing, sound plays normally, but is downmixed to 2ch. StageMaster detects this and displays a warning (once per app launch). If the warning appears, check the output device selection and the prerequisites above.
Always confirm multi-channel playback in rehearsal before the show. Because sound still plays even when downmixed, you won't notice unless you check. Confirm not just by ear, but also that each channel is registering a signal on the physical meters on the audio interface itself.
File > Preferences > DAW Integration (MIDI)
→ MIDI output port: choose from the list
The Play/Rec/Stop settings configured on each page (see "4.4 DAW Integration") are sent as Mackie Control Universal (MCU) format commands to the MIDI output port chosen here. In advance, create a virtual MIDI port — the IAC Driver in "Audio MIDI Setup" on macOS, or loopMIDI etc. on Windows — and assign that port to the DAW's MCU control surface input (the app itself does not create a virtual port). If nothing appears in the list, either no virtual MIDI port has been created, or StageMaster has not been granted access to MIDI.
File > Data Folder
→ check data.json / config.json using the OS's file manager
Help > About StageMaster
→ shows the Node.js / Chromium / Electron versions
If you have questions, feature suggestions, or bug reports, please feel free to get in touch.
📧 Contact: shimada@jscf.pro
Feedback received will be used to improve StageMaster going forward.
Thank you for using StageMaster.
For anything not covered in this guide, please check config.json via "Data Folder" at the bottom right of the screen, or refer to the in-app help.
StageMaster (hereinafter "this Software") is provided "AS IS." The author makes no warranties of any kind, whether express or implied, including but not limited to merchantability, fitness for a particular purpose, and non-infringement. The author does not warrant that this Software will operate without interruption or that it is free of errors.
This Software is currently a test version. It is still being verified for readiness for professional use; specifications may change without notice, and bugs may remain.
The author provides no compensation whatsoever for any accident or damage arising in connection with the use of this Software.
The author is not liable for any damages arising from the use or inability to use this Software, including but not limited to:
This Software is intended for use in live stage and broadcast productions, but it does not guarantee the success of any performance or broadcast.
Before any production use, always run a thorough rehearsal. Please confirm operation under production conditions, using the actual equipment, audio/video sources, and cue data you plan to use. The following in particular require caution, because they will appear to work normally at a glance even if misconfigured:
Depending on the nature and scale of the production, we also strongly recommend preparing backup means that do not depend on this Software (such as a spare playback device).
This Software is provided under the Apache License, Version 2.0. The full text of the
license is bundled at LICENSE-StageMaster-Apache-2.0.txt in the licenses folder at the
installation location.
Copyright (c) 2026 Masao Shimada

Licensed under the Apache License, Version 2.0 (the "License");
you may not use this file except in compliance with the License.
You may obtain a copy of the License at

    http://www.apache.org/licenses/LICENSE-2.0

Unless required by applicable law or agreed to in writing, software
distributed under the License is distributed on an "AS IS" BASIS,
WITHOUT WARRANTIES OR CONDITIONS OF ANY KIND, either express or implied.
See the License for the specific language governing permissions and
limitations under the License.
This Software bundles and makes use of the following open-source software. These are
separate pieces of software from this Software, and each is subject to its own license.
The author bears no responsibility for their behavior. A full breakdown is provided in
NOTICE.txt, in the licenses folder at the installation location.
The ASIO drivers for each audio interface, and VoiceMeeter (provided by VB-Audio Software), which may be used for verifying configurations with more than 8 channels, are not included with this Software. Users must obtain and install these themselves, and the author bears no responsibility for their behavior either.
Any rights clearance for the audio/video source material played back with this Software is the user's own responsibility. If using the YouTube playback feature, please comply with YouTube's Terms of Service. The author bears no responsibility whatsoever for rights infringement by a user.
When exporting, re-exporting, or providing this Software, please comply with all applicable export control laws and regulations, including Japan's Foreign Exchange and Foreign Trade Act. The user agrees not to provide this Software to any country or region subject to economic sanctions or an embargo, or to any individual or entity with whom transactions are prohibited.
This disclaimer is governed by, and shall be interpreted in accordance with, the laws of Japan. However, where a mandatory provision of the law of the country or region in which the user resides as a consumer exists that cannot be excluded by contract, that provision shall take precedence.
Author: Masao Shimada Contact: shimada@jscf.pro
Version 1.2 — August 19, 2026